25th May, 2018
More pendants finished during this week. Well done girls.


14th May, 2018
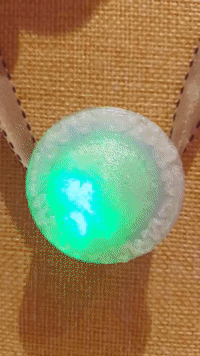
During week three and four of this term, the Cre8 Lab students were busy designing and building a 3D printed light up pendant. The first step was to design the front of the pendant using Tinkercad, which is an online, easy to use 3D CAD program that is free to all. The students learnt about measurements, aligning, grouping and general CAD engraving and embossing techniques. Then exported the design into a .stl file and sent it to our Makerbot printer.
The next step was to create a circuit using a coin cell batter holder with switch, two copper wires and a LED sequin. The students learnt about conductivity and the importance of a good connection and of course the positive and negative sides of the battery and LED, and what happens when these things are not correct.
Then the fun part… putting it all together and finishing it off with paint and ribbon, to further individualise their pendant.


